OAuth2 Tutorial using GitHub as an Authentication Service
In this tutorial we will see how to communicate with the GitHub authorization server using Membrane API Gateway to authorize HTTP requests based on the RFC 6749 OAuth 2.0 Authorization Framework, OpenID Connect Core and OpenID Connect Discovery.
This tutorial explains:
- Set up GitHub as an Authorization Server
- Set up Membrane as Client
- Perform a sample OAuth2 request authorization.
You will need about 10 minutes to complete. A GitHub account, internet connection and Membrane API Gateway
1. Set up GitHub as an Authorization Server
Step 1: Open the GitHub API console
Go to https://github.com/settings/applications/new.
Step 2: Creating an application
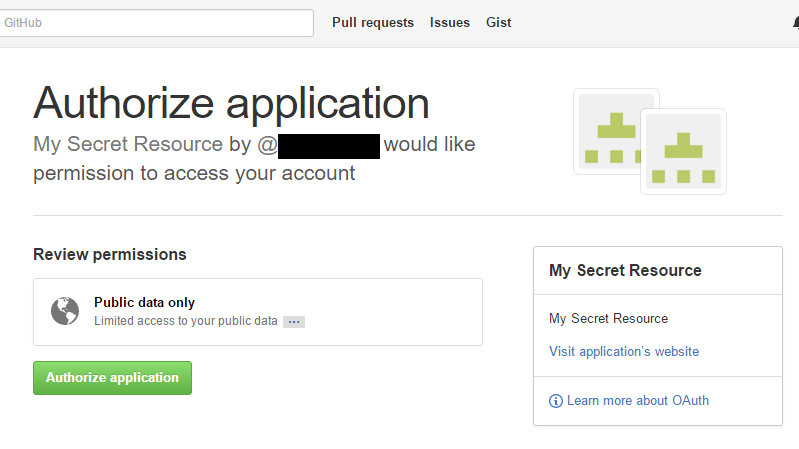
Choose an application name, for example, My Secret Resource.
The My Secret Resource will be shown to users together with the required permissions. It should inspire trust for the user to answer "Yes".
Enter the Membrane’s public URL as the Homepage URL.
The public URL is the URL your users will be using to access Membrane (or, to be more specific, the secret resource via Membrane). In our case, we use http://localhost:8080. For production use, one might use a publicly registered domain name. This means that only users accessing Membrane from the same host where Membrane is running on will be able to seamlessly log in. (Note that other users might still be able to log in via manual URL manipulation.)
Enter an application description and the authorization callback URL
The application description is displayed to all potential users of your application. The callback URL is the public URL with a callback path: http://localhost:8080/oauth2callback that gets called by GitHub after successful authorization.
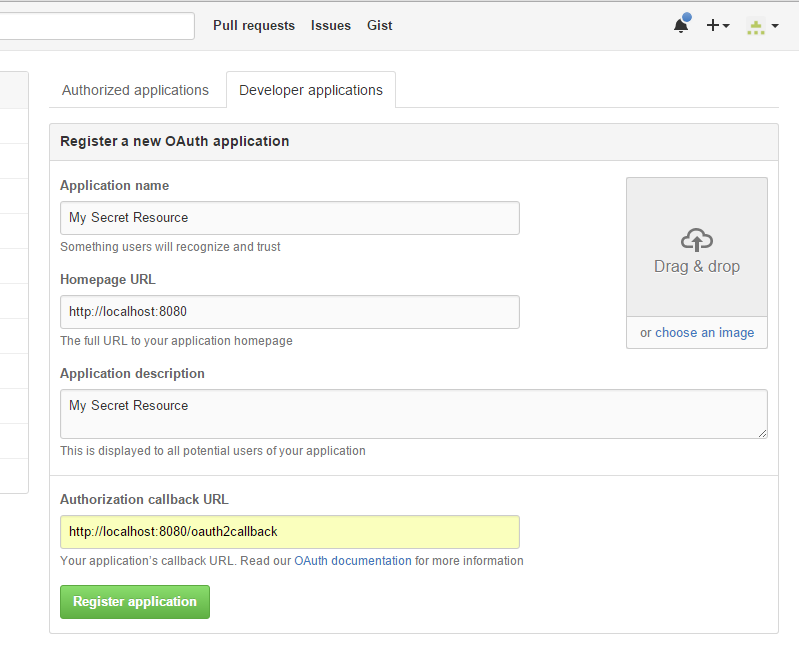
Immediately after the creation of the application, your client id and client secret are displayed.

Leave this browser tab open, as we later need the Client ID and the Client secret for Membrane’s configuration.
Step 3: Configure Membrane API Gateway
Download the Membrane API Gateway distribution 6.x or newer.
Extract the .zip archive and go to the /examples/authorization/oauth2/github directory.
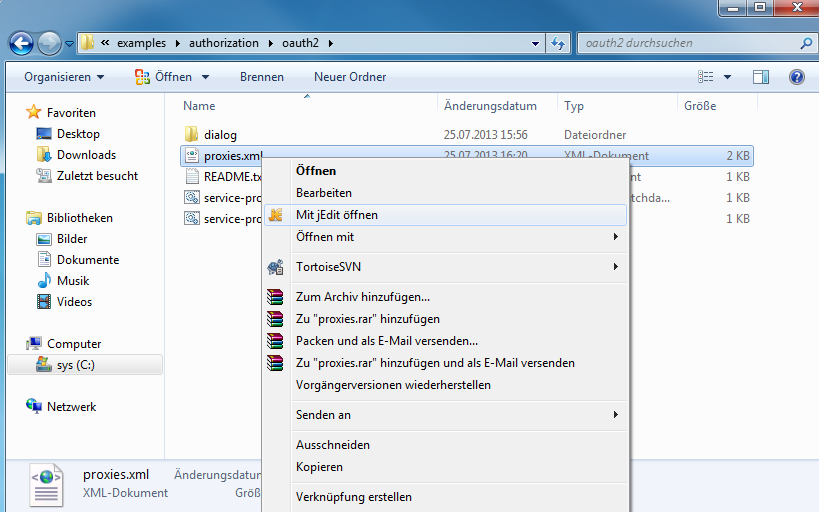
Open Membrane’s configuration file, proxies.xml, for editing.
<api port="8080">
  <oauth2Resource2>
    <github
      clientId="Enter client ID from Github here"
      clientSecret="Enter client Secret from Github here" />
  </oauth2Resource2>

  <!-- this will act as the secret resource to make the example simple. See below in the comments for an alternative -->
  <groovy>
    def email = exc.properties.'membrane.oauth2'.userinfo.username
    exc.response = Response.ok("Hello " + email + ".").build()
    RETURN
  </groovy>

  <!--
  Use the <target> instead of the <groovy> interceptor to forward requests to another host:
  <target host="membrane-soa.org" port="80" />
  -->
</api>
Listing 1: Sample oauth2 Configuration
Replace the clientId and clientSecret with the ones from your GitHub API Project.
Step 4: Start Membrane API Gateway
Go back to your file explorer to the examples/authorization/oauth2/github directory of Membrane.

Start Membrane by running membrane.sh
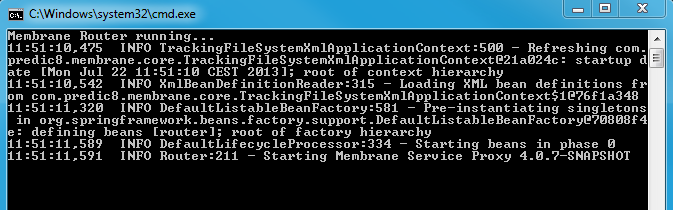
The console shows Membrane’s log messages.
As configured, Membrane is now listening on port 8080 for incoming HTTP connections. In the next section, we will connect to it using a browser and follow the OAuth2 steps to access our simulated "secret resource".
2. Perform a sample OAuth2 Request Authorization
As the full OAuth2 workflow is quite complex, we only describe a relevant subset in this tutorial.
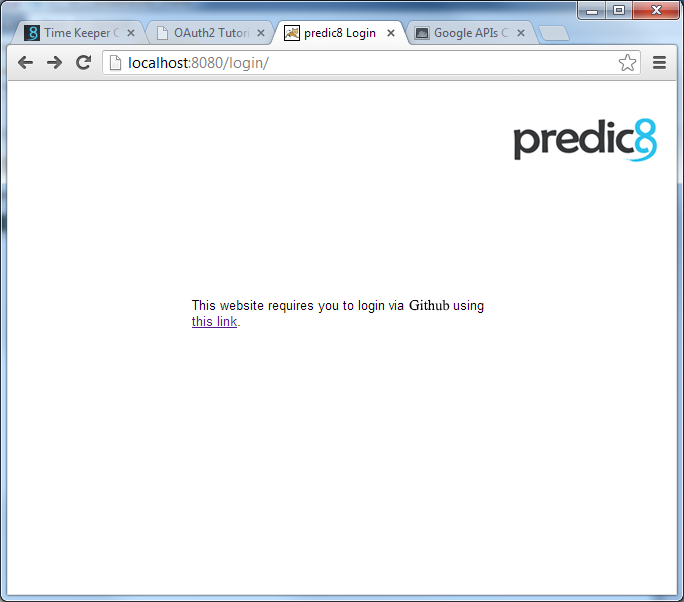
Step 5: Try to access the "secret resource"
Keep Membrane running (the console open).
Open a browser and go to http://localhost:8080/.
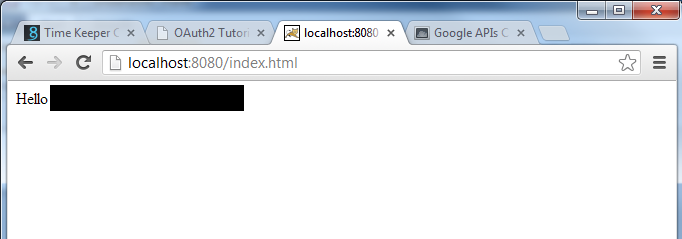
Congratulations, you have successfully completed an OAuth2 authorization setup.
Enjoy the simulated "secret resource", a personalized "hello" message from Membrane. ;)
Notes
In our setup, we used a simple, dynamically generated "Hello <your-github-account-name>." Page as the secret resource. The secret resource does not have to be hosted within Membrane but can reside on any other HTTP server Membrane has access to, including localhost.
- We did not perform any further checking of the user’s name to protect our secret resource. In practice, you should do that, as getting possession of a valid GitHub login is not really a challenge. ;)
- The web server hosting the secret resource should probably be protected by a firewall so that the user cannot access the secret resource directly by circumventing Membrane.
- You should use HTTPS for all untrusted network connections. The administrator should install SSL certificates and adjust the proxies.xml to use them for all HTTP exchanges that need to be secured.
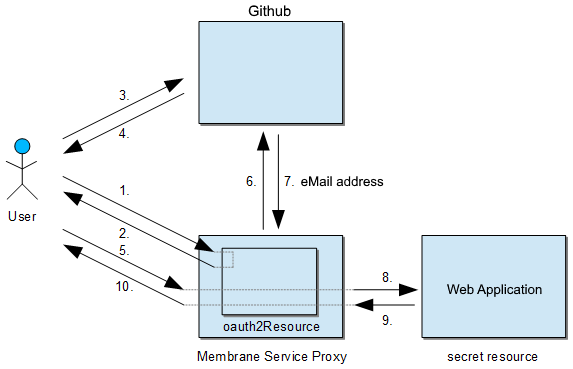
- Membrane API Gateway automatically takes care of using HTTPS for the HTTP exchanges 3, 4, 6 and 7.
- If potential users can connect via the open internet (or via any untrusted intermediary), use SSL for HTTP exchanges 1, 2, 5 and 10.
- Unless the network connection between Membrane API Gateway and the web server hosting the secret resource is safe, use SSL for HTTP exchanges 8 and 9.
- If the user (identified by a session ID cookie) issues any further requests, only steps 5, 8, 9 and 10 will take place.
- If the session is timed out, steps 3–5 might occur automatically if GitHub decides that the user already has granted trust to access the user’s name to Membrane.
Closing Comments
You have seen how quickly OAuth2 authorization can be set up using Membrane API Gateway.
As the communication between the OAuth2 authorization server (GitHub) and the resource server (Membrane and the secret resource) is not covered by the OAuth2 specification, this is GitHub-specific.
But as Membrane’s oauth2 feature is modular in its source code design, it is easy to implement additional adapters connecting to other authorization services: For example, Amazon, Dropbox, Facebook, Google, Microsoft and Twitter all support OAuth 2.
Please let us know if you run into any problems.